
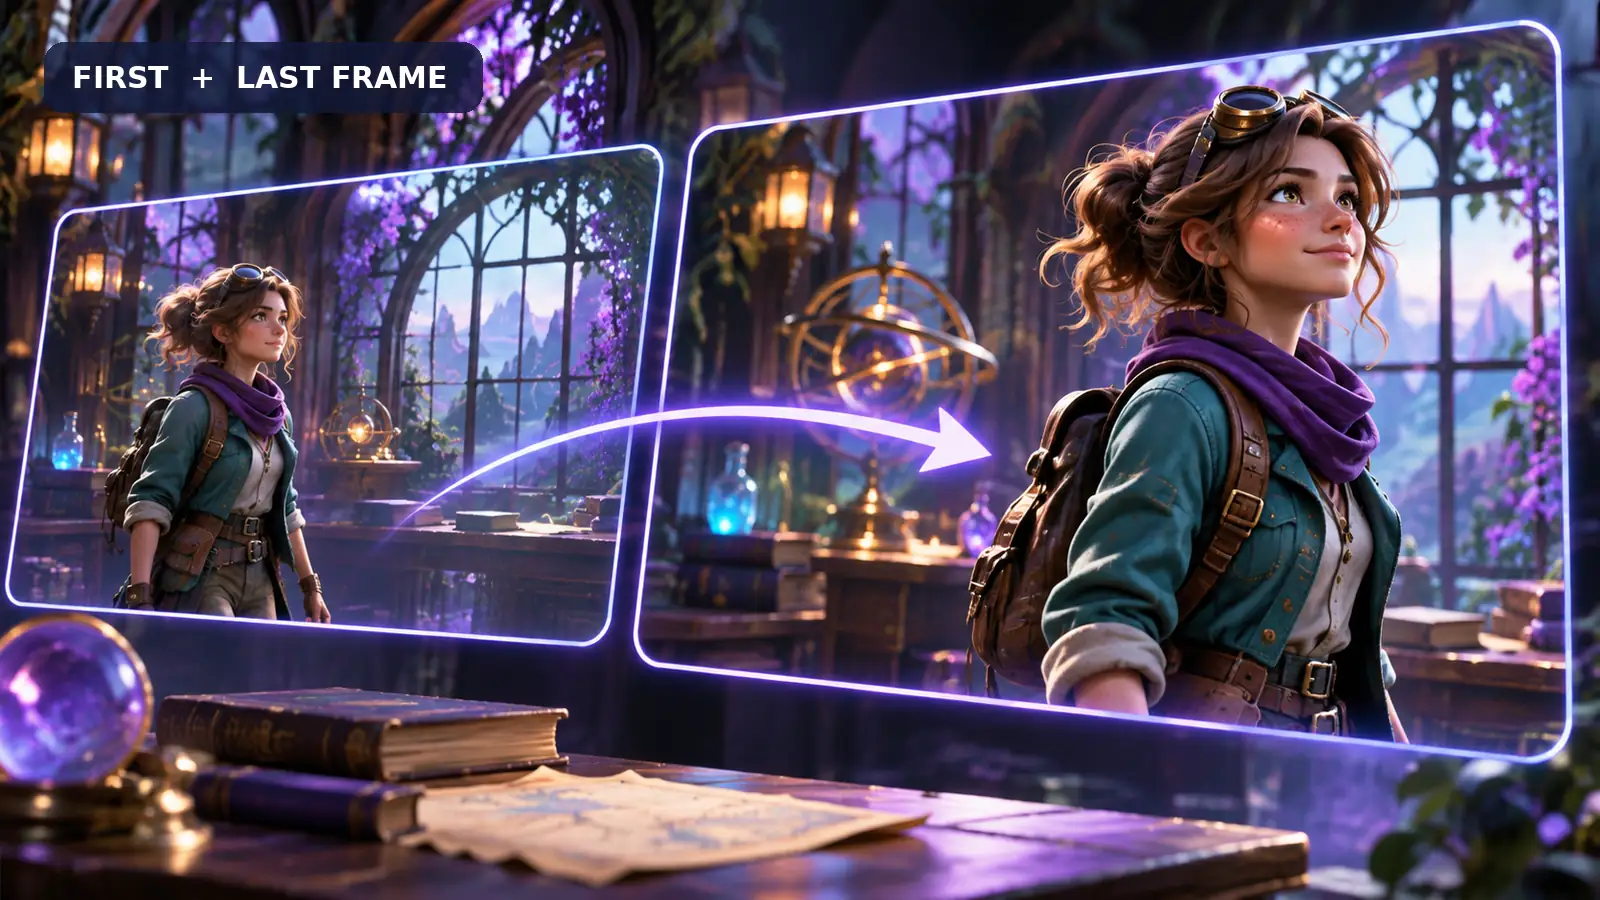
Two images can define where an AI video starts and ends. The difficult part is making the movement between those images look like one continuous shot instead of an abrupt scene change. This guide shows how to prepare a compatible pair of frames, write a transition prompt, evaluate the middle of the clip, and decide when a standard single-image animation is the better choice.
Our key finding: In a real five-second comparison, adding a last frame did not produce a noticeable improvement in the character’s movement. The two raw videos, prompts, settings and costs are shown below. An end frame can still be useful when a precise final composition matters, but our test did not establish that advantage.
Our real test: preparing matched first and last frames
For this article, we generated an opening frame with Nano Banana 2 Lite on November 7, 2026, then edited that same image into an intended final frame using the same image model. Two actual generated reference images are shown below. Each image generation used four credits, eight credits in total. The opening shot was a courier standing away from a teal door; in the second image, the requested change was to place her hand on its handle while preserving the setting.
| Actual first frame | Actual edited end frame |
|---|---|
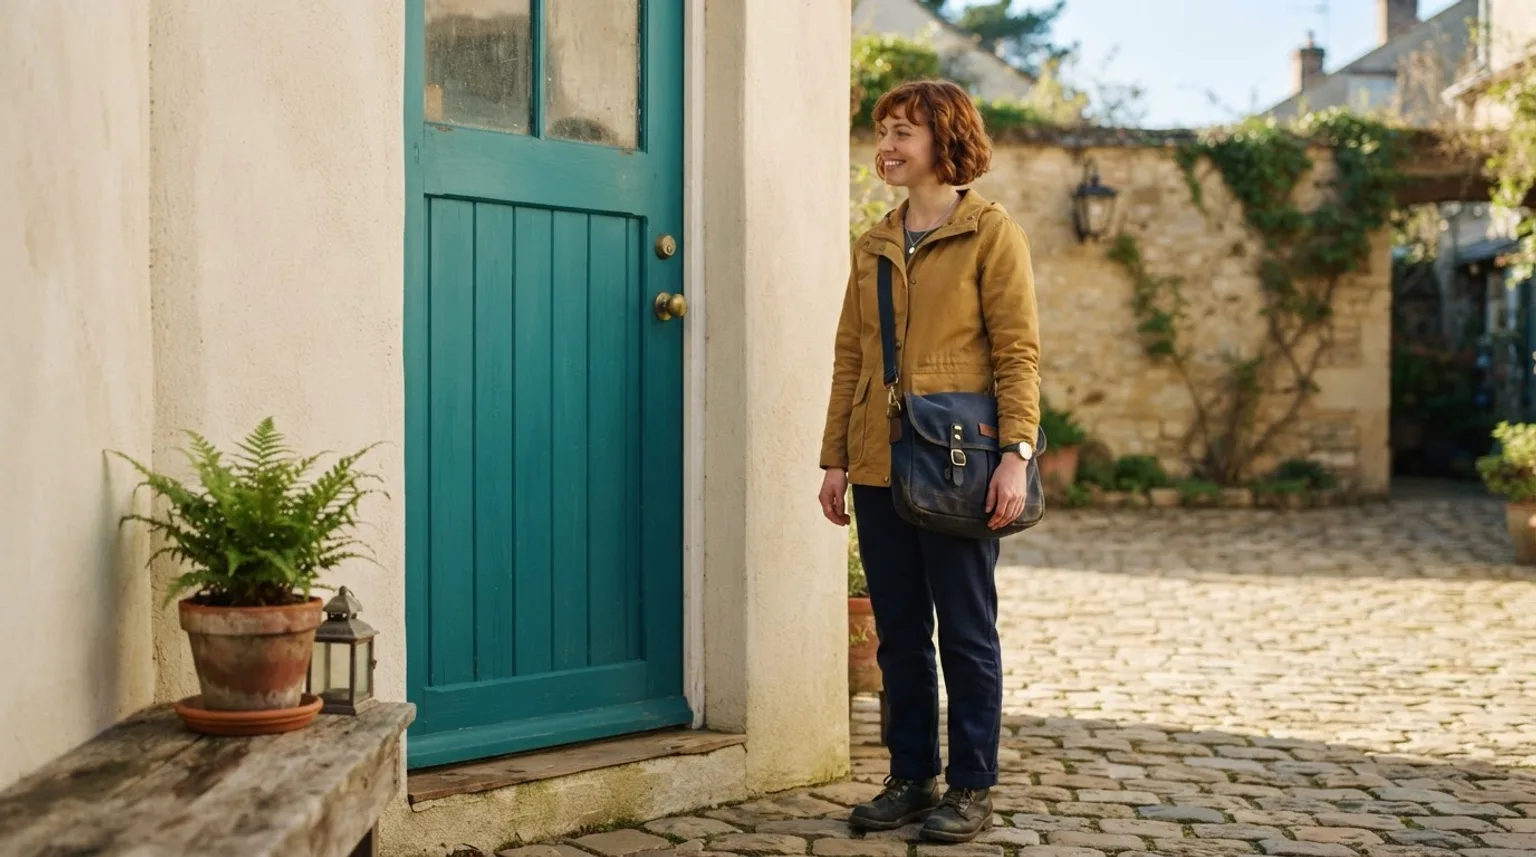 | 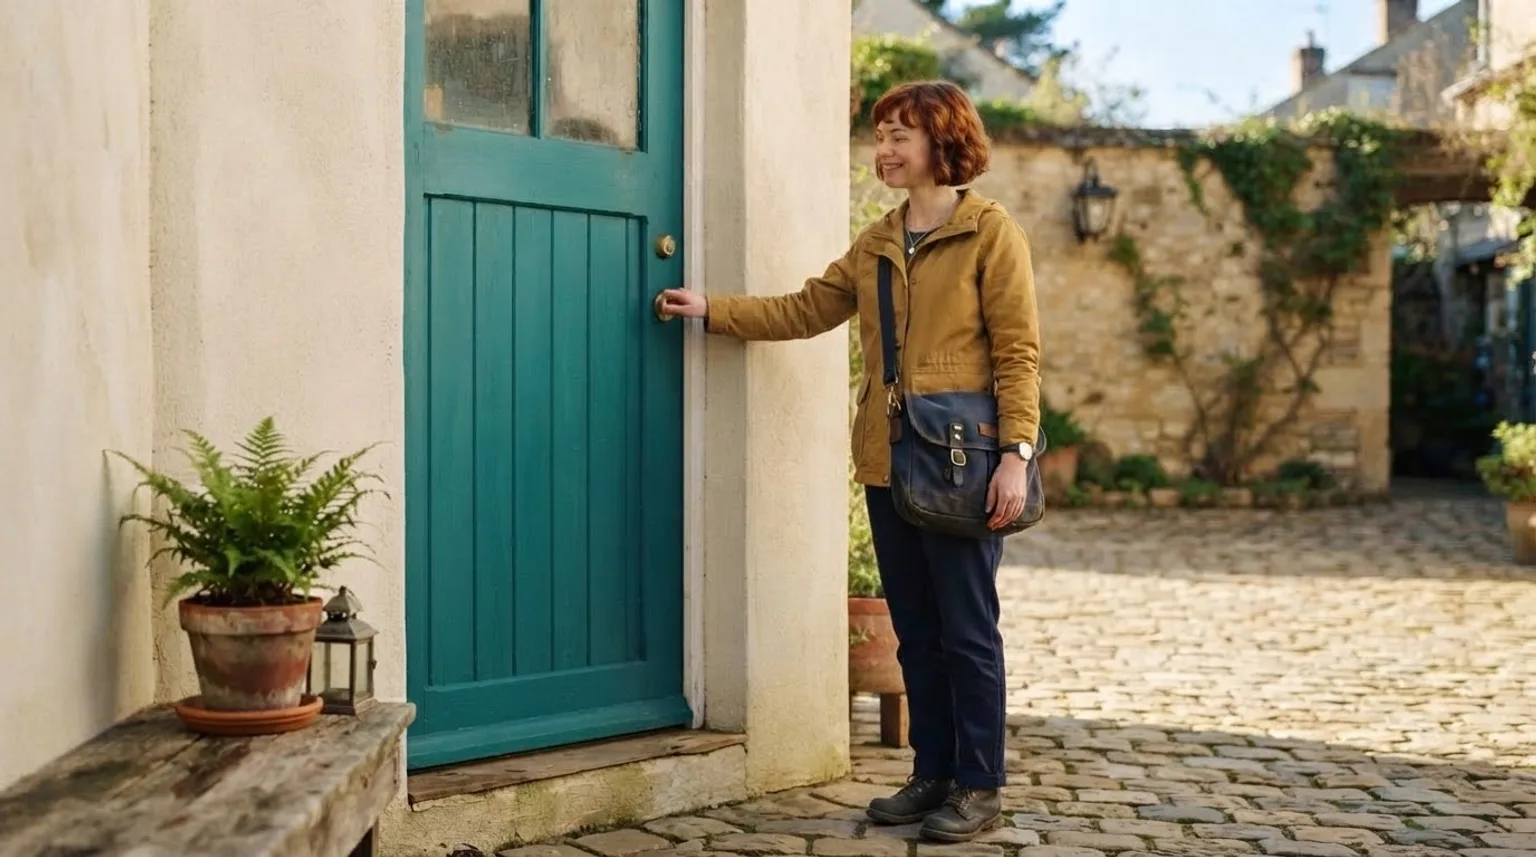 |
Exact edit prompt: “Edit @start to show the SAME young auburn-haired courier in mustard-yellow jacket and navy satchel taking two small steps closer toward the SAME teal workshop door, and resting her RIGHT hand on the brass knob. Preserve exactly the same camera angle, perspective, courtyard architecture, plant, lighting, hairstyle, face identity, clothing and composition. Do not create a new scene, do not zoom, do not change background or door. This is the END FRAME of a continuous single shot. No titles, no borders.”
We submitted two five-second 720p videos with the Seedance 2 Mini model: one using the start frame alone and the second adding the end frame, with an identical motion prompt. The two video tasks cost 75 credits each (150 total). Both generations completed successfully, and both videos were uploaded to our YouTube test channel as unlisted clips. The footage is shown below so you can judge the movement yourself. A completed generation is not proof that the movement looks natural: these are raw first-attempt results, not curated success examples.
Actual video A: first frame only
Watch actual Test A on YouTube. Five seconds, 720p, same motion prompt, no specified end frame.
Actual video B: first and last frames
Watch actual Test B on YouTube. Five seconds, 720p, same motion prompt, with our edited end frame supplied.
Exact shared motion prompt: “One continuous medium-wide shot. The same auburn-haired courier in the mustard-yellow jacket takes two natural steps toward the teal workshop door, gently reaches out with her right hand and touches the brass door knob. Keep the person’s face, satchel, clothes, courtyard, door and morning lighting consistent. Camera remains at fixed eye height with minimal movement. No cuts, no object morphing.” We did not run additional attempts or change any prompt settings between the two videos.
What We Observed: Both Videos Looked Nearly Identical
After watching both generated clips, our editor found the visible actions and movement nearly identical. In this one comparison, supplying an end frame did not produce an obvious visual improvement over the start-frame-only version. Both outputs are embedded above so readers can make their own comparison.
| What we compared | What we found |
|---|---|
| Character movement | Almost identical to the viewer in both five-second clips |
| Visible advantage of adding the end frame | No clear advantage noticed in this particular test |
| Endpoint fidelity | Not separately measured against the intended last-frame image |
| Attempts | One generation per configuration; the same prompt, model, duration and resolution |
Why this might happen: Our motion prompt already told the courier to approach the door and touch its knob. The start-frame-only version may therefore have reached a very similar action without being constrained by a supplied end frame. This is a possible explanation, not a confirmed property of the model.
What this test actually tells us: For this simple courier movement, the extra end frame did not yield a visible benefit worth claiming. We did not separately measure final-frame accuracy, so we cannot say Video B reached the target position more precisely. A stronger follow-up would compare both video endpoints against the target image in a scene with a less predictable destination. This test contains one generation per setup, not a reliability estimate across repeated attempts.
What are first and last frames in AI video?
In a supported image-to-video workflow, you provide an opening image and an ending image. The video model attempts to generate a sequence connecting them. Unlike supplying just a first frame, you specify a visible destination. That can be useful when a character must arrive at a doorway, a product must finish centered, or a camera reveal must end at a planned composition.
Kling documents a Start and End Frame option and warns that large differences between the two images can produce a shot switch instead of the continuous motion you wanted. This limitation matters more than writing a longer prompt: two incompatible images can ask the model to solve an impossible transition. Kling’s official start/end frame guide.
Step 1: Design the two frames as one scene
Start from a single approved image. Make a modified second image rather than generating a completely unrelated image from scratch. Preserve the same character or object, clothing, background architecture, lighting direction, camera height, aspect ratio, and approximate color palette. Change only what the shot needs to accomplish.
| Keep consistent | Change deliberately |
|---|---|
| Face, hairstyle, outfit, accessories | Character position, gaze or arm pose |
| Room, props, horizon and lighting | Camera distance or framing |
| Aspect ratio, visual style, time of day | Small action or reveal |
Example: A courier stands beside a closed workshop door in Frame A. In Frame B, the same courier has taken two steps forward and placed a hand on the door handle. The environment and outfit remain unchanged. This is a more coherent transition request than switching from the workshop to a mountain landscape in five seconds.
Prepare Frame B without losing the identity
When using an image editor or reference-based image generator, supply Frame A as the reference and request only the changes required for the final pose. Review the edit at full size. Look for moved buttons, missing bags, changing hairstyles, or a doorway that shifted sideways. Fix those before using credits on video.
Prompt status: illustrative edit prompt, not a recorded generation.
Step 2: Use a mode that actually accepts both frames
- Open the image-to-video generator and choose a model or mode that explicitly supports a start frame and an end frame. Not every model or interface exposes both inputs.
- Upload Frame A as the first image and Frame B as the last image. In Kling’s documented interface the option is called Add End Frame; UI labels can change.
- Choose an output aspect ratio matching your source images, where supported, and a duration suitable for the intended move.
- Describe the movement that connects A to B. Do not simply repeat the visual description of the room or character.
- Generate one controlled attempt. Save the output, the exact prompt, model, duration and cost before revising anything.
Runway’s image-to-video prompting documentation likewise recommends focusing on movement and using sequential or time-based instructions when the shot includes multiple actions. This is guidance for writing motion prompts, not a claim that every Runway model supports two endpoint images. Runway’s official prompting guide.
Step 3: Write a movement prompt that connects the frames
Specify the continuous action, the camera behavior and the end state. A useful template is:
Example A: Character reaches a door
Example B: Product moves closer to camera
Example C: Landscape reveal
These prompts are starting points to test. A model can still ignore or reinterpret an instruction. Avoid claims such as “guaranteed perfect transition.”
Step 4: Check the middle, not just the endpoints
Two attractive stills do not prove that the generated clip works. Watch the video at normal speed, then scrub frame by frame through the midpoint. Ask:
- Does the character remain the same person throughout the motion?
- Does a hand move naturally toward the door, or teleport at the last second?
- Do signs, buttons or accessories change shape?
- Does the background stay stable, or does the model silently switch locations?
- Does the last frame resemble the requested ending without a sudden snap?
| Problem | First correction to try |
|---|---|
| Sudden scene cut | Make the two stills more similar; reduce the physical distance or visual changes between them |
| Character morphs | Correct the two stills so facial features and wardrobe match before regenerating |
| Action rushes at the end | Shorten the requested action, or choose a longer duration if available |
| Camera drifts unexpectedly | Specify one simple camera behavior and remove competing movement commands |
| Final image is forced into place | Reduce the endpoint gap; consider producing two connected shots instead of one |
When End Frames Can Make Results Worse
A last frame is another visual constraint, not a guarantee of continuity. If the pair asks for incompatible scenes or too much movement in too little time, the model may produce an unwanted cut, a sudden change of shape, or a rushed ending. These are troubleshooting scenarios based on model guidance and common failure modes, not problems we observed in our two courier clips.
- Different camera angles or lens perspectives: A wide front-facing shot followed by an unrelated close-up or side view can look like a cut rather than a continuous move. Try: keep perspective similar, or explicitly animate a plausible camera move over a longer clip.
- Different faces, outfits or background details: The model may change a person’s identity or reshape objects while connecting the images. Try: edit the first image into the second instead of generating two unrelated pictures.
- Different lighting or time of day: A daylight opening and a night-time ending may force an unnatural global change during a short shot. Try: use consistent lighting or make the transformation the main action with enough time to show it.
- Too much physical distance for the duration: Reaching a distant destination in five seconds may cause a jump or unnaturally fast motion. Try: shorten the gap, increase duration where supported, or split the action into two clips.
Kling’s official start/end-frame guide specifically warns that large differences between the images can cause a shot switch. Runway’s image-to-video prompting guide recommends checking timing and duration when unwanted cuts appear.
When should you skip the end frame?
If the shot only needs leaves moving in the wind, a blinking character or subtle camera movement, one source image may be enough. Preparing an end image adds work and can unnecessarily constrain the model. A last frame is most useful when the destination matters: the final pose, composition or reveal must be planned in advance.
For a multi-shot sequence, another option is to create separate clips and join them in an editor. Runway also documents using the final frame of a previous clip as the starting image for the next one. That is a clip-extension workflow rather than asking one video to perform a large visual transformation all at once. See Runway’s guidance.
A small experiment you can repeat
To compare two methods fairly, create a matched pair of stills and keep the model, duration and prompt as consistent as possible. Generate (A) from the first frame only and (B) from the same first frame plus your prepared final frame. Record whether B reaches the endpoint more accurately, whether the middle contains more distortion, and how many attempts were needed. Do not compare credits without recording model, duration and generation settings.
Experiment checklist: model/version; original image; edited end image; exact prompts; duration; resolution; date; number of generations; credits; saved outputs; observed errors. We ran this comparison once with Seedance 2 Mini, and our two clips looked almost the same. For a stronger comparison, repeat each condition several times and score the last frame separately from the motion in the middle.
Bottom line
Our real test did not show a visible advantage from adding an end frame: the five-second courier motions looked almost identical. That does not mean the feature is useless—its purpose is to guide a chosen destination, which we did not measure here. If your ending composition matters, start with compatible images, specify one plausible movement, check the final frame and the middle, and reduce the visual gap before adding more prompt text.
For related AI video techniques, see our camera movement prompt examples and real Runway tests and our guide to AI image-to-video motion problems.
Sources and editorial disclosure: Kling Start & End Frames; Runway Image-to-Video Prompting Guide. The courier image-edit and shared video-motion prompts above were used in our real test. Other example prompts are illustrative and are not represented as tested results.