
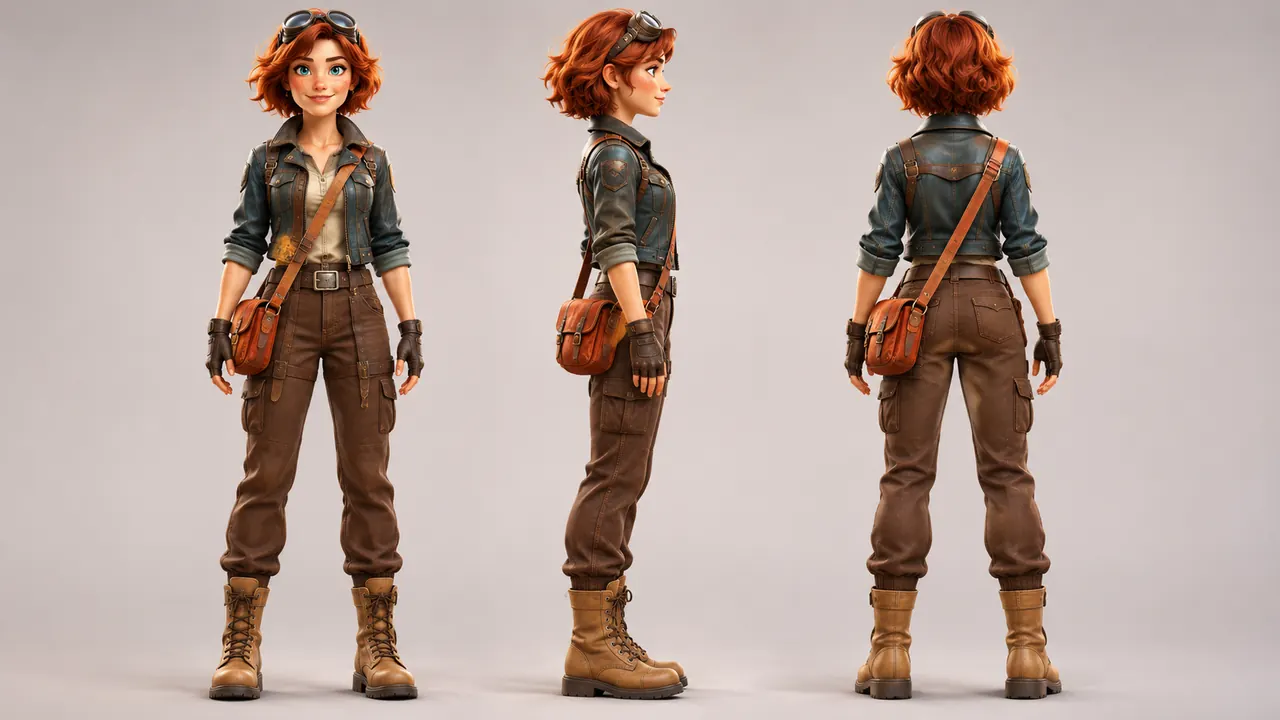
You have a character image you like. Now you need the same person from the front, from the side, and from behind. Asking an image generator for “more angles” sounds simple, but one panel may change the haircut, another may move the shoulder bag, and the back view may invent a completely different jacket.
This guide focuses on building a usable three-angle character reference sheet. For the broader problem of creating the same person across finished scenes, read our guide to keeping one AI character consistent between images.
What is an AI character reference sheet?
A reference sheet is a visual specification of one character: recognizable face, hairstyle, proportions, colors, clothing and accessories. A turnaround is the part that shows that character from multiple directions. An expression sheet, by contrast, focuses on changes in the face.
For an initial turnaround, three full-body views are enough to expose many consistency problems:
- Front: face, jacket closure, chest details, leg proportions and footwear.
- Side: nose and hair silhouette, jacket thickness, bag position and posture.
- Back: hair length, jacket construction, straps and the placement of accessories.
The purpose is not to create an especially dramatic illustration. The sheet should make it easy to compare details without distracting scenery, perspective or lighting.
Before generating: choose the right master image
Select one sharp, approved portrait that shows the character clearly. A three-quarter full-body view is useful because it reveals the face and at least some side details. Avoid crowded scenes, strong cinematic shadows, cropped boots and objects covering important clothing. If you only have a headshot, expect more guesswork in the outfit and body proportions.
Write a compact identity lock before the first turnaround. For example:
Distinguish essential identity traits from styling. The hair, face and signature clothes must match. Camera angle, background and lighting are allowed to change only where the particular task requires it.
Step 1: Create and approve a master character
If you already have an image, use it. Otherwise, generate one with enough detail to establish the character. Here is the exact starter prompt we submitted for the AI Revolution demonstration on November 6, 2026:
We submitted this as one 3:4 image generation in Runway using Nano Banana 2 Lite. That establishes a repeatable source prompt. Inspect the actual image before using it as the identity reference; a polished render is not automatically a good continuity anchor.
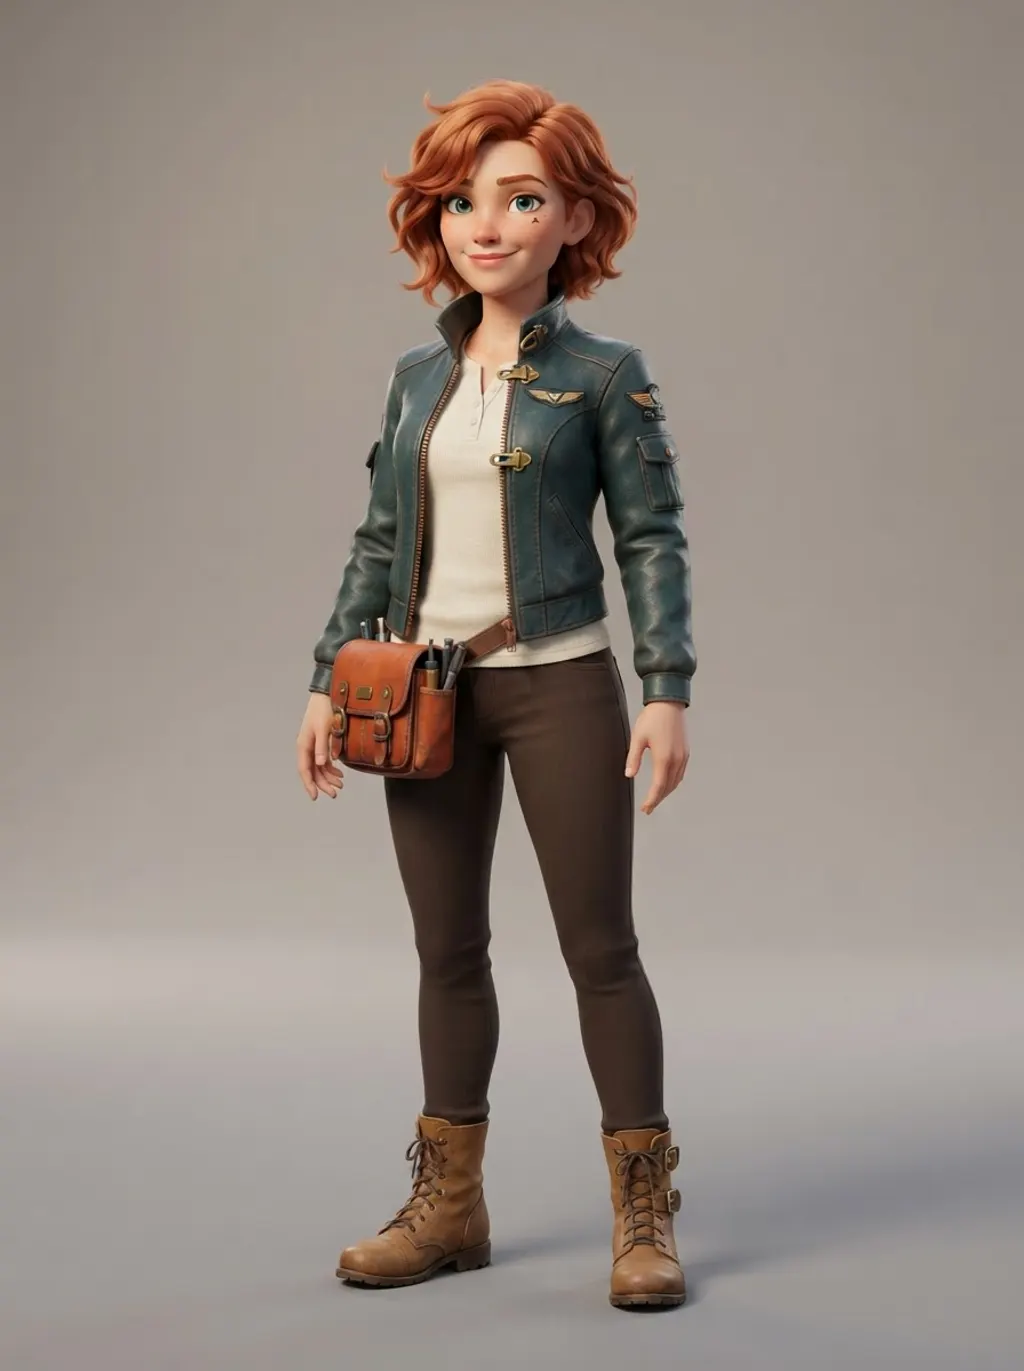
Step 2: Turn the master into front, side and back views
Upload or select the approved master image as the model’s reference. Specify the number of views, order, camera directions, pose and background. Keep the description of the character consistent with the original.
For this second generation, we selected the initial Runway image as a reference and requested a 16:9 composite sheet using Nano Banana 2 Lite. We recorded one submitted generation for each step. The exact generated result is displayed below. Before relying on it as a final character specification, visually compare the views against the master: we have not yet completed a full visual audit and do not claim that the model preserved every detail.
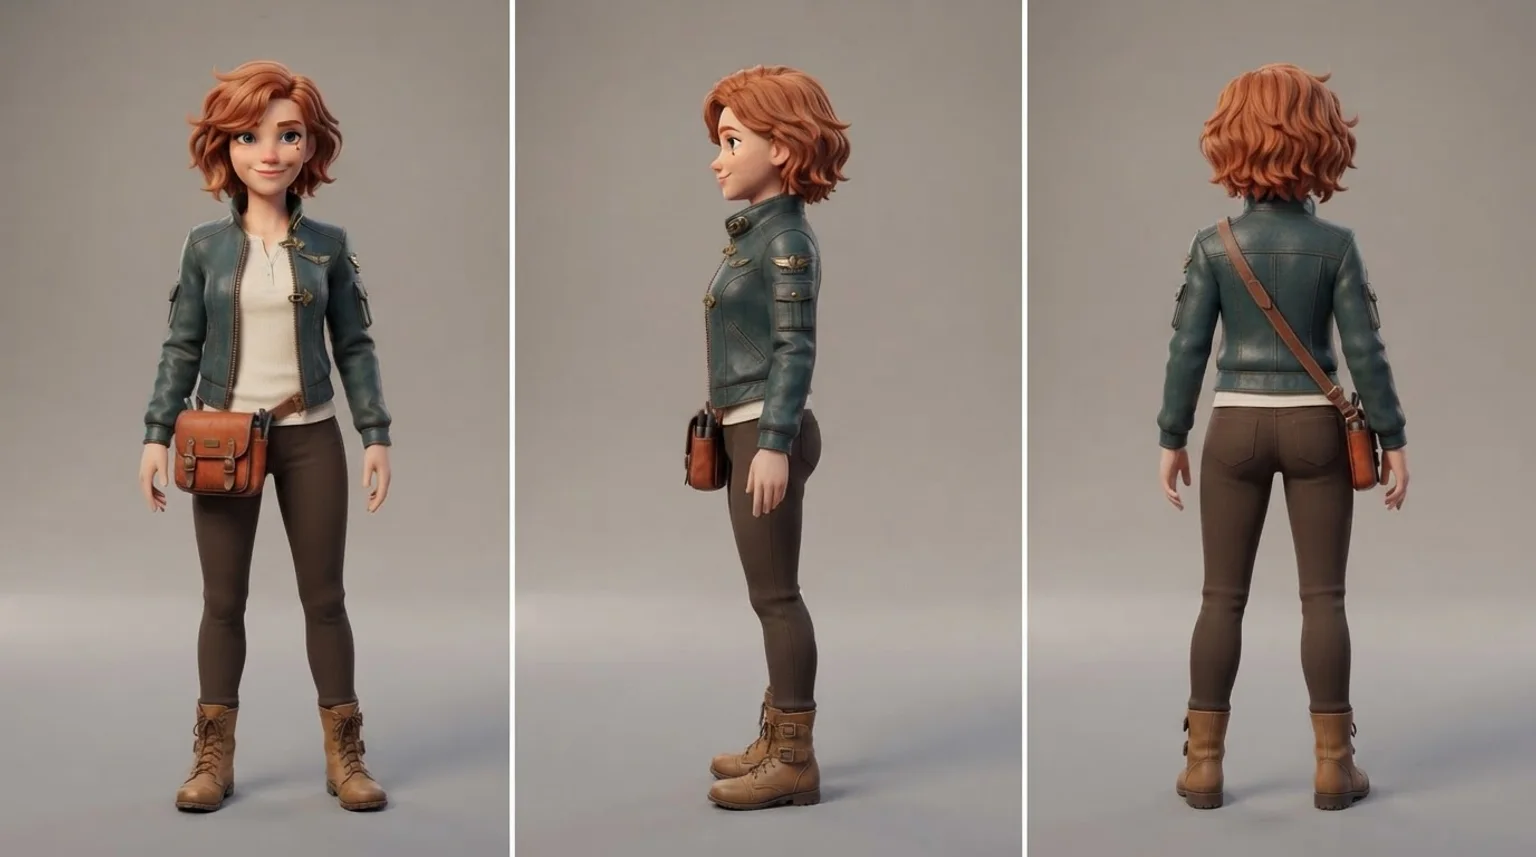
Which AI tools can you use for a character turnaround?
The most useful capability is image reference support, not a fashionable model name. For a front–side–back character sheet, check whether your selected image generator lets you submit an approved image along with the prompt, whether it produces a composite layout, and whether you can edit a single failed view without restarting.
| Tool or workflow to investigate | What to check before using it |
|---|---|
| Runway + Nano Banana 2 Lite | Tested here: one initial 3:4 image generation followed by one 16:9 generation with that image as an explicit reference. The actual multi-view consistency remains to be visually audited. |
| ChatGPT Images | Try attaching the approved master in a new image-editing request; inspect whether the face and clothing remain the same across the requested angles. We did not run this comparison. |
| Midjourney | Check current character/omni-reference options, supported versions and layout behavior before paying for a turnaround workflow. Not tested in this article. |
| FLUX | Check the particular FLUX model and interface for input-image editing and reference controls; “FLUX” alone does not identify one consistent workflow. Not tested here. |
| Ideogram | Check whether the current editing or remix workflow supports your master image and the desired three-panel layout. Not tested here. |
We are deliberately not ranking these tools from one Runway experiment. A meaningful comparison needs the same reference character, comparable instructions, recorded settings and a visual check of each output. If your tool cannot preserve an input image as a reference, a prompt-only turnaround will be a less controlled experiment.
Step 3: Check the turnaround before using it
Zoom in and compare the three views with the original, not just with one another. A quick review should cover the following:
| Check | What must match | Typical problem |
|---|---|---|
| Face | Eye color, facial shape, distinguishing mark | New face or missing freckle in a front view |
| Hair | Color, length, parting and recognizable silhouette | Longer or differently parted hair at the rear |
| Clothes | Jacket color, fasteners, cuffs, trouser details | Closures or sleeves redesigned between panels |
| Accessories | Satchel, strap, buckles and which side wears them | Bag jumps sides or disappears in profile |
| Body | Height, head-to-body ratio, boot shape | One panel shows a noticeably different build |
| Views | Real front / 90° profile / rear | Two slightly different three-quarter poses |
Important: A side-view panel often reveals a different amount of the face and accessories than the front view. Do not mark every concealed detail as a failure. Judge features that should actually be visible from that angle.
Step 4: Repair only the failed view
When one panel is wrong, you do not necessarily need to regenerate the entire sheet. If your editor supports masks or reference-guided local edits, isolate the affected panel. Otherwise, create that one angle separately and rebuild the sheet from approved views.
Do not describe an image edit as “identity locked” unless you have checked it. AI tools may change details outside the requested region. If a fully reliable garment pattern, brand logo or physical product is essential, manually correcting the artwork can be more efficient than repeatedly generating alternatives.
Why the back view is different from the front
A single front or three-quarter image does not contain the physical information needed to reconstruct an exact back view. The model must invent hidden seams, straps, hair arrangement and accessory geometry. That makes a generated rear view a design proposal.
Choose a version you like, approve the unseen details and add that approved rear view to your permanent reference set. From then on, reuse the master plus the additional views rather than asking the model to invent the back again.
Step 5: Reuse your sheet in later image or video scenes
- Save the approved master and turnaround with clear filenames and a version number.
- When generating a new scene, attach the approved reference sheet where your image or video tool allows it.
- Paste the same compact identity block, then write a separate instruction for the new pose or setting.
- Change only one big variable at a time. If both angle and costume change, it is harder to diagnose which caused a mismatch.
- After generation, compare the new output against the canonical references rather than the immediately preceding AI output.
The scene prompt intentionally separates identity requirements from new scene instructions. Different models may offer different reference-image limits or processing options, so confirm them in your chosen interface.
Should you generate all the views at once or separately?
One three-panel sheet is convenient for the first design pass and easy to share as a reference. Its weakness is that one incorrect panel can force more editing, and characters may be small inside a wide composite.
Separate approved views take more steps but let you refine a profile or rear view without changing the front image. For long-running stories or recurring characters, we favor approving the master first, then retaining each approved angle as a separate reusable asset. This is editorial workflow advice, not a measured claim that one method always outperforms the other.
Common mistakes and fixes
| Problem | Next action |
|---|---|
| Each panel looks like a different person | Return to one approved master; shorten the scene description and lock the identity traits |
| The side view is another front view | Specify “exact 90-degree side profile, facing screen right” |
| Clothes or bag change between angles | Describe fasteners, materials and accessory placement; regenerate only the affected view |
| Faces are too small to inspect | Use fewer full-body panels or a separate facial detail sheet |
| Back view invents features | Treat them as proposed design details; approve or correct them, then save that view |
| Background distracts from the character | Use flat or neutral studio lighting and a plain backdrop |
Frequently asked questions
Can AI create a character turnaround from a single image?
Yes, it can generate candidate front, side and back views from a single image. However, unseen angles require invented details, and identity consistency is not guaranteed. Review and approve each view.
Do I need a reference photo?
No. You can first generate an original character from a written description. Once you approve it, using that image as a reference is generally more informative than repeatedly describing the character from scratch.
Does the same random seed guarantee the same character?
No. Seed behavior is model- and workflow-specific. It can help reproduce a setup in some tools but does not replace approved reference images.
Can I use a character sheet to make AI videos?
Often, yes—when your video tool accepts reference images. For some image-to-video workflows, first generating a clean scene still from your character sheet can provide a more suitable starting frame than uploading the turnaround directly.
Practical conclusion
A good character reference sheet is a repeatable specification, not just an attractive collage. Approve a master, generate limited viewpoints, compare them against the source, correct mismatches and retain the accepted views. This reduces ambiguity in later generations but does not eliminate AI consistency failures.
Related: How to Keep the Same Character in AI-Generated Images for changing scenes while preserving identity; and How to Keep the Same AI Character in Multiple Videos for video-specific continuity.
Further reading: Kapwing’s character reference sheet explainer, Benibix’s turnaround prompt examples.
Evidence note: AI Revolution submitted two original Runway image-generation requests on November 6, 2026—one master portrait and one reference-guided three-view sheet. The exact prompts are documented above. The two images labelled Real test above are actual Runway outputs, converted to WebP for WordPress. The featured cover is a separate illustrative image, not an experimental result. A final side-by-side assessment of consistency is still needed before publication. All correction and scene prompts are clearly marked as illustrative, untested examples.