

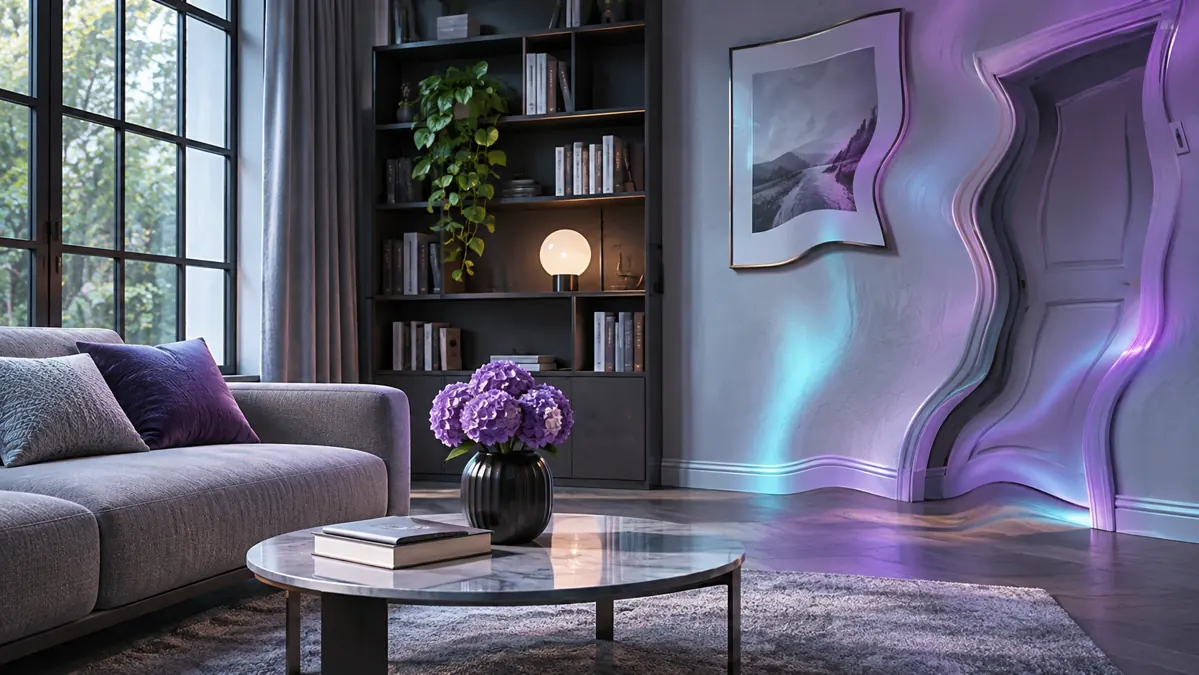
A doorway bends halfway through your AI video. A bookshelf changes shape. The subject looks fine, but the room behind them seems to melt. These are different forms of background instability, and they do not all have the same fix. Before you spend credits regenerating, identify what is actually changing.
Quick diagnosis: what is going wrong?
| What you see | Try first | Do not expect |
|---|---|---|
| Walls or windows bend | Locked camera, simpler action, cleaner reference frame | A deflicker filter to rebuild geometry |
| Patterns shimmer | Reduce tiny repeated details; inspect a shorter take | A prompt alone to remove every flicker |
| Furniture appears or disappears | Remove clutter, use image-to-video, change framing | Extra adjectives to reliably restore objects |
| Room distorts during an orbit or zoom | Test a stationary shot, then a gentler camera move | Perfect depth reconstruction from a single image |
| Scene changes between clips | Reuse location references or consistent start frames where supported | Identical backgrounds from text alone |
The technical umbrella term is temporal inconsistency: details that should persist across frames change unexpectedly. A video model generates a sequence of images; unlike a conventional 3D scene in an animation package, it may not maintain exact object geometry through every movement.
Step 1: Find the first bad frame
Pause the output near the start, middle, and end. Compare three fixed landmarks—such as a door edge, window corner, and table leg. Write down the earliest point where one changes. If the geometry stays intact but the surface shimmers, treat that as a texture problem, not a moving-wall problem.
If the problem begins only when the camera moves, first regenerate with a locked-off camera. This is a diagnostic test, not a guarantee of improvement. If the wall still bends with a stationary camera, focus on the source image and scene complexity instead.
Step 2: Clean up the starting image
For image-to-video, the input image provides the composition and visual information that guide the clip. Runway’s official prompting guide recommends a high-quality image without existing visual artifacts. Start with clear architecture, distinct object boundaries, and fewer tiny repeated patterns. If a hand overlaps a chair or a shelf is packed with small objects, consider correcting or simplifying the image before animation.
Use a medium shot when the story is about a person’s reaction rather than the entire room. Cropping out complex shelves and tiled walls removes details the model would otherwise have to maintain.
Step 3: Separate subject motion from camera motion
Start with one action and a stationary camera. Only after evaluating that result should you introduce a slow push-in, pan, or orbit. Runway’s Gen-4 guidance recommends adding prompt elements gradually when troubleshooting unexpected results.
Prompt A: image-to-video, stationary camera
The camera remains locked on a tripod. The seated person slowly turns their head toward the window. The furniture and architectural lines remain stationary. One continuous shot with restrained natural movement.Prompt B: image-to-video, gentle camera movement
The camera makes a slow, straight push-in toward the seated person as they look up. The room remains unchanged. Smooth continuous motion, with the doorway and window frames staying straight.These are illustrative prompts, not documented successful generations. Compare the output with the same starting image; do not assume that words such as “unchanged” will lock pixels in place.
Prompt C: text-to-video, simple room
A medium shot of a person seated beside one large window in a simple, uncluttered room. The person slowly turns their head. Static tripod camera, steady lighting, continuous shot. A single table and chair remain in the background.Text-to-video needs a visual description as well as motion instructions. Image-to-video already receives much of the scene description from the source image. This distinction is explained in Runway’s separate official prompting guides.
Step 4: Use the controls your particular model actually offers
Runway: image-to-video and references
In Runway, begin with Image to Video and a clean source frame when preserving an existing composition matters. For Gen-4.5, the official guide says the image establishes composition, lighting, subject matter and style, while the text describes motion. Keep the first attempt simple. Do not assume an old Motion Brush or a numerical motion slider exists in every current Runway model.
Kling: Motion Brush and Static Brush where available
Kling’s official Motion Brush tutorial describes a Static Brush that can designate areas intended to stay fixed. In a compatible workflow, mark the background areas that should remain still and direct the motion brush only at the moving subject. Follow the tutorial’s recommendation to make the text prompt agree with the selected motion. Availability depends on the model and mode you are using; this is not a universal Kling setting.
Google Flow: start frames and ingredients
Google Flow offers video workflows powered by models including Veo 3.1. Its supported options include start/end frames and visual ingredients, but availability varies by the specific model, subscription and region. For example, Google documents different feature support for Veo 3.1 Lite, Fast and Quality; check the active model before selecting a workflow. When the location must resemble a particular image, choose a compatible Frames to Video or Ingredients workflow rather than relying on a text-only description. Google’s documentation also recommends avoiding contradictory instructions between references and the prompt. These features guide consistency but do not guarantee perfectly fixed geometry.
Step 5: Use shorter shots and stop before the failure
If the clip is usable until the fourth second and then the window bends, consider cutting before the defect rather than paying for a longer generation. A shorter shot may also be easier to evaluate. Save the original source image and prompt so that a replacement shot can be attempted without changing everything at once.
Do not treat Extend as an automatic repair. Extending a clip continues or builds on footage; it does not inherently correct warped geometry already present. If the scene has visibly broken, restart from a clean reference or switch to another shot.
Step 6: Know what post-production can and cannot repair
A deflicker or temporal-smoothing workflow may help mild brightness or texture fluctuation, but it cannot reconstruct a doorway that has changed shape. Trimming, a cutaway, a masked still background, or compositing a separately generated foreground may be more appropriate. Advanced masking or rotoscoping can be performed in editors such as DaVinci Resolve or After Effects, but it takes additional work and may not be worth it for a short clip.
Inspect the corrected clip at normal speed and frame by frame. Temporal processing can introduce unwanted trails or ghosting, so compare the edited version with the original before accepting it.
If it still warps: a low-waste decision path
- Still camera, same defect? Simplify or replace the source frame.
- Only during camera movement? Reduce the move or use a cut instead.
- Only tiny textures flicker? Simplify patterns or test a light post-production fix.
- Objects disappear? Change framing or use fewer objects.
- Multiple attempts fail? Stop repeating the same prompt. Try a different supported reference workflow or a different model, documenting what changed.
Set a stopping rule before generating: for example, one baseline attempt and two targeted revisions. This is a budgeting suggestion, not a tested optimal number. Credit prices vary by model, plan, duration, and date, so check the current price in your tool rather than relying on a universal cost estimate.
A simple test log you can copy
| Record | Example entry |
|---|---|
| Tool / model | Exact model and mode |
| Input | Filename or source image |
| Prompt | Full text, unchanged |
| Settings | Duration, aspect ratio, references, controls |
| Failure | “Window bends around 00:03” |
| Cost | Actual credits used |
| Change / outcome | One change and what visibly happened |
If you change both the model and the prompt, you cannot confidently say which caused the difference. Keep your comparison narrow.
AI Revolution generation examples: locked camera vs. orbit
We generated two independent five-second text-to-video examples using Seedance 2.0 Mini through Runway on November 9, 2026. Both were set to 1280 × 720 and cost 75 Runway credits each (150 credits total). Below are two independently generated examples created specifically for this article. They illustrate two different camera instructions. They are not a controlled before-and-after fix: each clip was generated independently, without a shared starting frame. We have not completed a frame-by-frame visual assessment, so we do not claim that either clip proves reduced warping.
Example 1: locked camera
Generation details: Runway · Seedance 2.0 Mini · Text to Video · 5 seconds · 1280 × 720 · 75 Runway credits · November 9, 2026.
Exact prompt: A realistic five-second video of a tidy modern living room with one large rectangular window, a straight wooden bookshelf, a square doorframe and a person sitting quietly on a sofa. The person slowly turns their head to the left. Locked tripod camera, continuous single take, stationary furniture and straight architectural lines. Natural daylight, photorealistic. No cuts.
Example 2: sweeping orbit
Generation details: Runway · Seedance 2.0 Mini · Text to Video · 5 seconds · 1280 × 720 · 75 Runway credits · November 9, 2026.
Exact prompt: A realistic five-second video of a tidy modern living room with one large rectangular window, a straight wooden bookshelf, a square doorframe and a person sitting quietly on a sofa. The person slowly turns their head to the left while the camera performs a pronounced sweeping orbit around the sofa, revealing changing perspectives of the window, bookshelf and doorway. Continuous single take, natural daylight, photorealistic. No cuts.
Viewing note: During a normal-speed review, the site owner did not notice obvious background distortions in either clip, including the orbit-camera example. This is an informal observation, not a frame-by-frame inspection or proof that the model eliminates warping.
How to use these examples: Compare the straight edges of the doorway, window and bookshelf while the subject moves. For a meaningful test of camera motion as the cause of warping, repeat the experiment with the same source image, model and settings, changing only the camera instruction. The two clips above do not isolate that variable.
Related AI Revolution guides
For better shot planning, read AI Video Camera Movement Prompts. If motion instructions are being ignored, see Why AI Image-to-Video Won’t Follow Your Prompt. For consistent endpoints, use our First and Last Frames guide.
Official documentation
- Runway: Image to Video Prompting Guide
- Runway: Text to Video Prompting Guide
- Kling: Motion Brush and Static Brush
- Google Flow: Create Videos
Frequently asked questions
Why do AI video backgrounds warp?
Video generators can change the apparent geometry or identity of background objects between frames, especially when the camera moves or the scene contains fine detail. Check fixed landmarks such as doorframes to distinguish geometry errors from flickering textures.
Will a locked camera always prevent background warping?
No. A locked camera reduces one source of scene complexity, but the model may still change furniture, textures or architectural lines. Test the shortest usable shot and inspect the output rather than treating a camera instruction as a guarantee.
Does Kling Static Brush work with every model?
Do not assume so. Brush controls and supported modes can differ by Kling product version and account. Confirm that Static Brush is available in the specific interface and model you are using before building your workflow around it.
Bottom line
Background warping is not one bug with one magic setting. Identify whether geometry, textures, objects, or camera movement are failing. Then make the smallest possible change: a cleaner image, a stationary camera, a simpler action, a supported reference or static-area control, or a shorter edit. The goal is a usable shot—not endless regeneration.
Editorial transparency: This guide combines official product documentation, troubleshooting guidance and two independently generated Runway text-to-video examples with documented prompts and credit costs. We have not performed a controlled comparison or a frame-by-frame visual assessment of the embedded clips, so no improvement in background stability is claimed.