

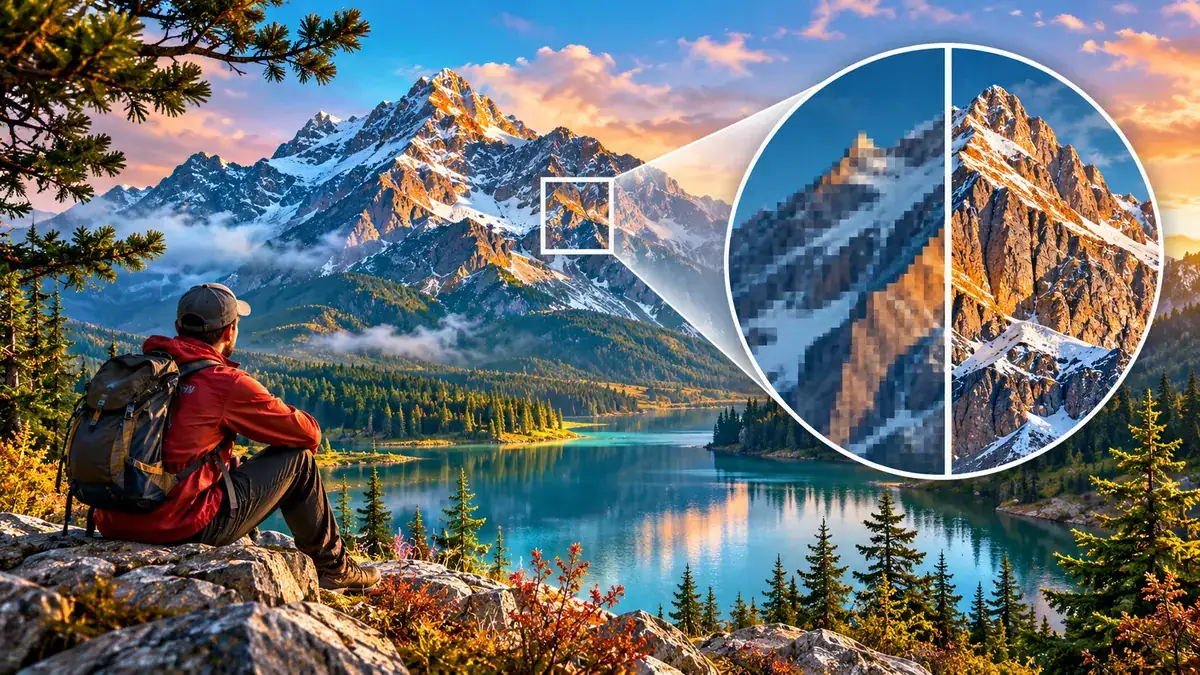
Upscaling changes pixel dimensions; it does not guarantee sharper real-world prints. Before choosing a 4K export, work backward from the physical print size and viewing distance.
Quick answer: Choose the intended print dimensions in inches or centimeters. For a close-viewed print, calculate a starting pixel target at roughly 300 pixels per inch; larger wall art may be viewed farther away and need less.
Why this problem happens
A file that looks sharp on a phone can reveal invented texture, jagged text, or distorted faces in print. Pixel dimensions and print dimensions must be considered together.
Step-by-step workflow
- Choose the physical print size and viewing distance; ask the print provider for its recommended PPI and file requirements.
- Multiply each dimension in inches by the target PPI. For example, 12 × 8 inches at 300 PPI requires 3600 × 2400 pixels.
- Compare the source pixel count with the target and calculate the enlargement factor. If your generator supports a genuinely higher native output resolution, try that before upscaling.
- Choose conventional resizing for already-clean artwork or preview a suitable AI upscaler when missing texture is visibly limiting quality. Check whether its invented details remain acceptable.
- Inspect faces, fingers, lettering and repeating patterns at 100%, then assess the image at its intended physical print size.
- Export in the format and color profile requested by the print provider; use a proof or small test print for important jobs.
A prompt you can copy and adapt
Create a high-resolution editorial landscape photograph of a mountain lake in early morning light, clear tree silhouettes, natural water reflections, subtle atmospheric haze, no text, no logos, and fine but believable environmental detail.
If the first attempt fails
If your generator offers a higher native output size, try that option and inspect whether the composition and details stay consistent. Otherwise upscale a copy, keeping the original untouched. Enlarging pixels does not guarantee better textures, and repeated JPEG re-exports can introduce compression artifacts.
Common mistakes to avoid
- 3840×2160 is one common 4K format, not a universal print-quality threshold.
- Upscalers can hallucinate textures.
- WebP is useful for the website, but the printer may request JPEG, PNG, or TIFF.
How to verify the result
Compare the source and enlarged image at matching displayed sizes, then inspect a 100% crop for halos, invented patterns and changed facial features. Check the intended print dimensions before ordering.
Print resolution calculator
Pixels required = print width in inches × target PPI. For a 10 × 8 inch print at 300 PPI, start with 3000 × 2400 pixels. A 12 × 8 inch print at 300 PPI needs 3600 × 2400. A 20 × 16 inch print at 150 PPI also needs 3000 × 2400. These are sizing examples, not guarantees of visible quality.
What 4K actually means here
A common UHD 4K frame is 3840 × 2160 pixels. At 300 PPI, that corresponds to approximately 12.8 × 7.2 inches (32.5 × 18.3 cm) before cropping. 4K describes pixel dimensions, not guaranteed print quality. If you need a different aspect ratio, calculate the target dimensions for the print rather than forcing a 16:9 image into a square frame.
Interpolation, AI super-resolution, and generative upscaling
Traditional interpolation (such as Lanczos) estimates new pixel values from nearby pixels without reconstructing lost semantic information. AI super-resolution uses learned image patterns to estimate sharper-looking details. More generative upscaling can substantially invent textures such as hair, skin pores or foliage. These may look convincing but are not evidence of what the original scene contained.
How to choose a practical upscaling tool
Photoshop Image Size: useful when you need a predictable conventional resize and want to control Resample. Upscayl: an option for local AI-based super-resolution where its supported models and system requirements fit your workflow. Topaz Gigapixel: a dedicated AI enlargement and face-recovery workflow to evaluate when image detail matters. Magnific: worth considering for creative texture generation, but check invented details carefully. Adobe Firefly: offers an AI image-upscaling workflow. This is a task-oriented shortlist, not a hands-on comparison or a statement about current pricing.
Choose the smallest scale that meets your required dimensions: 2× doubles each side (four times as many pixels); 4× quadruples each side (sixteen times as many pixels). If you need 3×, a 4× output may be resized down to the target, but extra pixels alone do not improve fidelity. Preserve the source and inspect 100% crops before committing to print.
Choose the correct workflow
For an illustration or photo that already has good geometry, upscale and inspect fine details. For a tiny face, missing fingers, or broken text, fix the underlying defect first. If the print shop requires bleed, include it in the document size and keep important content inside the safe area.
A controlled comparison you can perform
Save the original, then produce a 2× and a 4× upscale using the same tool. Compare equal-size crops of hair, text, hands, and repeated textures. Record whether either version creates fake edges or invented details. Only choose the larger version if it genuinely improves the intended print.
Export and color checks
Ask the printer which format, color profile, and bleed settings it accepts. Many photo-print workflows accept sRGB, while other printers specify their own profiles; follow the provider’s requirements. WebP is the optimized delivery format for AI Revolution website images, but a print provider may require JPEG or TIFF. Avoid repeated lossy JPEG saves and do not convert to CMYK blindly. For important work, request a proof or order a small test print. PPI describes image pixels per printed inch; printer DPI refers to the printer’s dot output, not additional source-image detail.
What has and has not been tested
This guide explains print-sizing math and inspection; it does not claim a physical print test or benchmark across AI upscalers. The controlled image comparison below measures conventional interpolation only.
Print-size cheat sheet: calculate before choosing 4K
| Print size | 300 PPI target | 150 PPI target |
|---|---|---|
| 5 × 7 in | 1500 × 2100 | 750 × 1050 |
| 8 × 10 in | 2400 × 3000 | 1200 × 1500 |
| 12 × 8 in | 3600 × 2400 | 1800 × 1200 |
| 16 × 20 in | 4800 × 6000 | 2400 × 3000 |
Example: from 1200 × 800 pixels to a 12 × 8-inch print
At 300 PPI, the print requires 3600 × 2400 pixels. Divide each target dimension by its corresponding source dimension: 3600 ÷ 1200 = 3 and 2400 ÷ 800 = 3. You need a 3× enlargement along each side. A 2× output would reach only 2400 × 1600; a 4× output gives more pixels than this print requires, but not necessarily better detail. This is a calculated example, not a physical print test.
Why changing DPI metadata is not upscaling
In Photoshop, choose Image > Image Size. With Resample disabled, changing Resolution changes the physical print dimensions but not the underlying pixel count. With Resample enabled, Photoshop creates or removes pixels. Adobe explains the difference in its official image sizing guide. A 1000 × 1000-pixel file remains 1000 × 1000 even when its metadata says 300 PPI.
What to inspect before sending the file to a printer
- Faces: compare eye shape, skin and identity with the original. AI-generated eyelashes and pores are not necessarily real details.
- Text and logos: zoom in and confirm every character. Re-typeset important text rather than relying on generative upscaling.
- Repeating patterns: inspect windows, bricks, hair and tree branches for invented or doubled shapes.
- Edges: check for halos from aggressive sharpening.
- Print setup: ask the print service for bleed, safe margins, accepted file format and required color profile before final export.
Adobe offers an image upscaler that can add plausible detail, but added detail must still be checked. If a face is already blurry, fix the source problem first: six causes of blurry AI faces. If a generated image contains distorted hands, use our hand-repair workflow before enlarging it.
Visual example: 3× resizing does not restore missing detail
We ran a controlled conventional resizing comparison using a generated mountain illustration. This is a real, reproducible processing example, not an AI upscaler benchmark or a physical print test. On mobile, open the image at full size to inspect the crops.
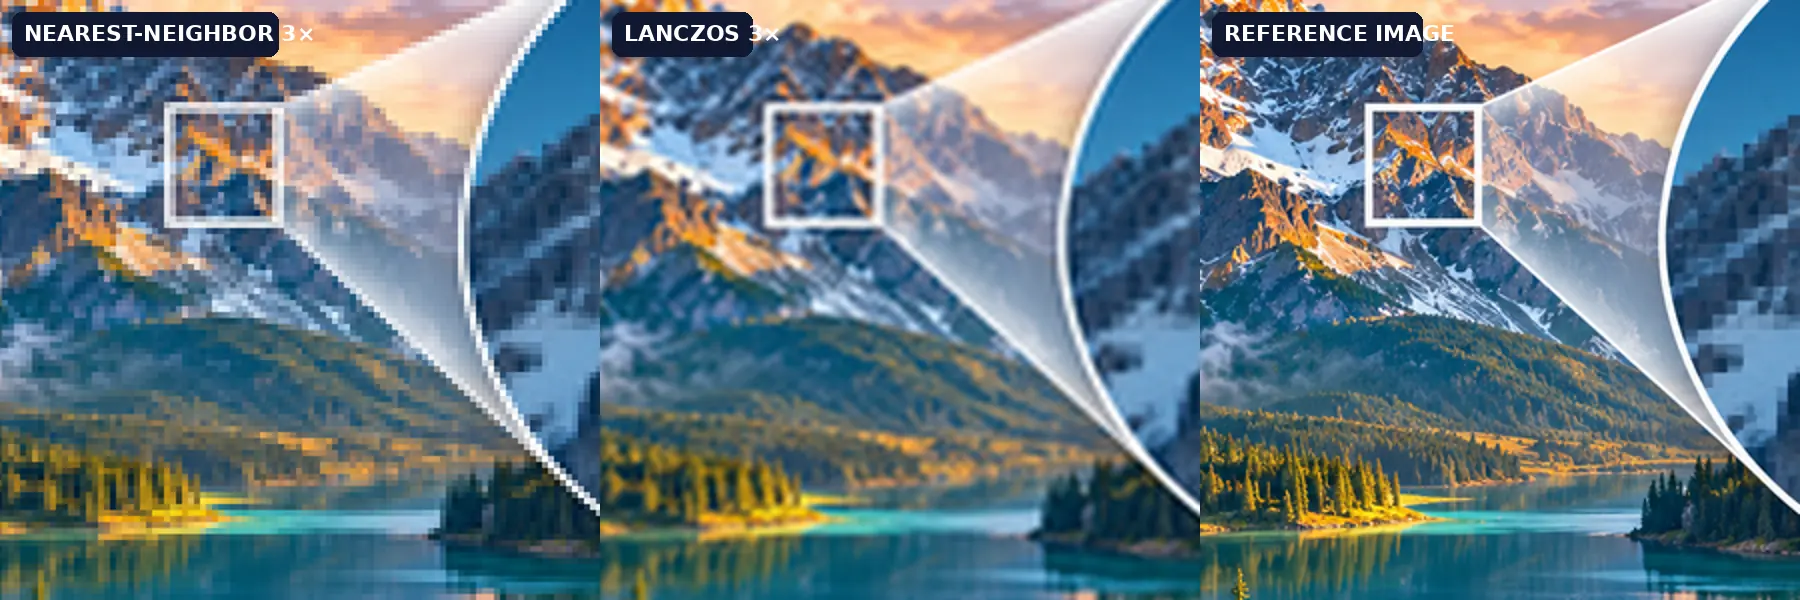
Exact method: The generated landscape was resized to a 960 × 540-pixel reference using Pillow Lanczos. That reference was reduced to 320 × 180 pixels with Lanczos. We enlarged the smaller file back to 960 × 540 using Image.Resampling.NEAREST and Image.Resampling.LANCZOS, then cropped the same 300 × 300-pixel region from both results and the reference. For visibility, each crop was displayed at 600 × 600 pixels. This comparison uses one source and one run per algorithm, with no paid credits.
What to learn: Nearest-neighbor preserves obvious pixel blocks, while Lanczos interpolates smoother edges. Neither restores the exact mountain texture present in the reference. A generative AI upscaler may create plausible new texture, but its fidelity would need a separate test. For printing, calculate the required pixels first and inspect fine detail at the intended size rather than choosing a larger file solely because it says “4K.”